How to send photos from Facebook or Instagram.
If you would like to add a photo to be printed on 4x6 photo paper from your Facebook or Instagram account you can do so by following these steps.
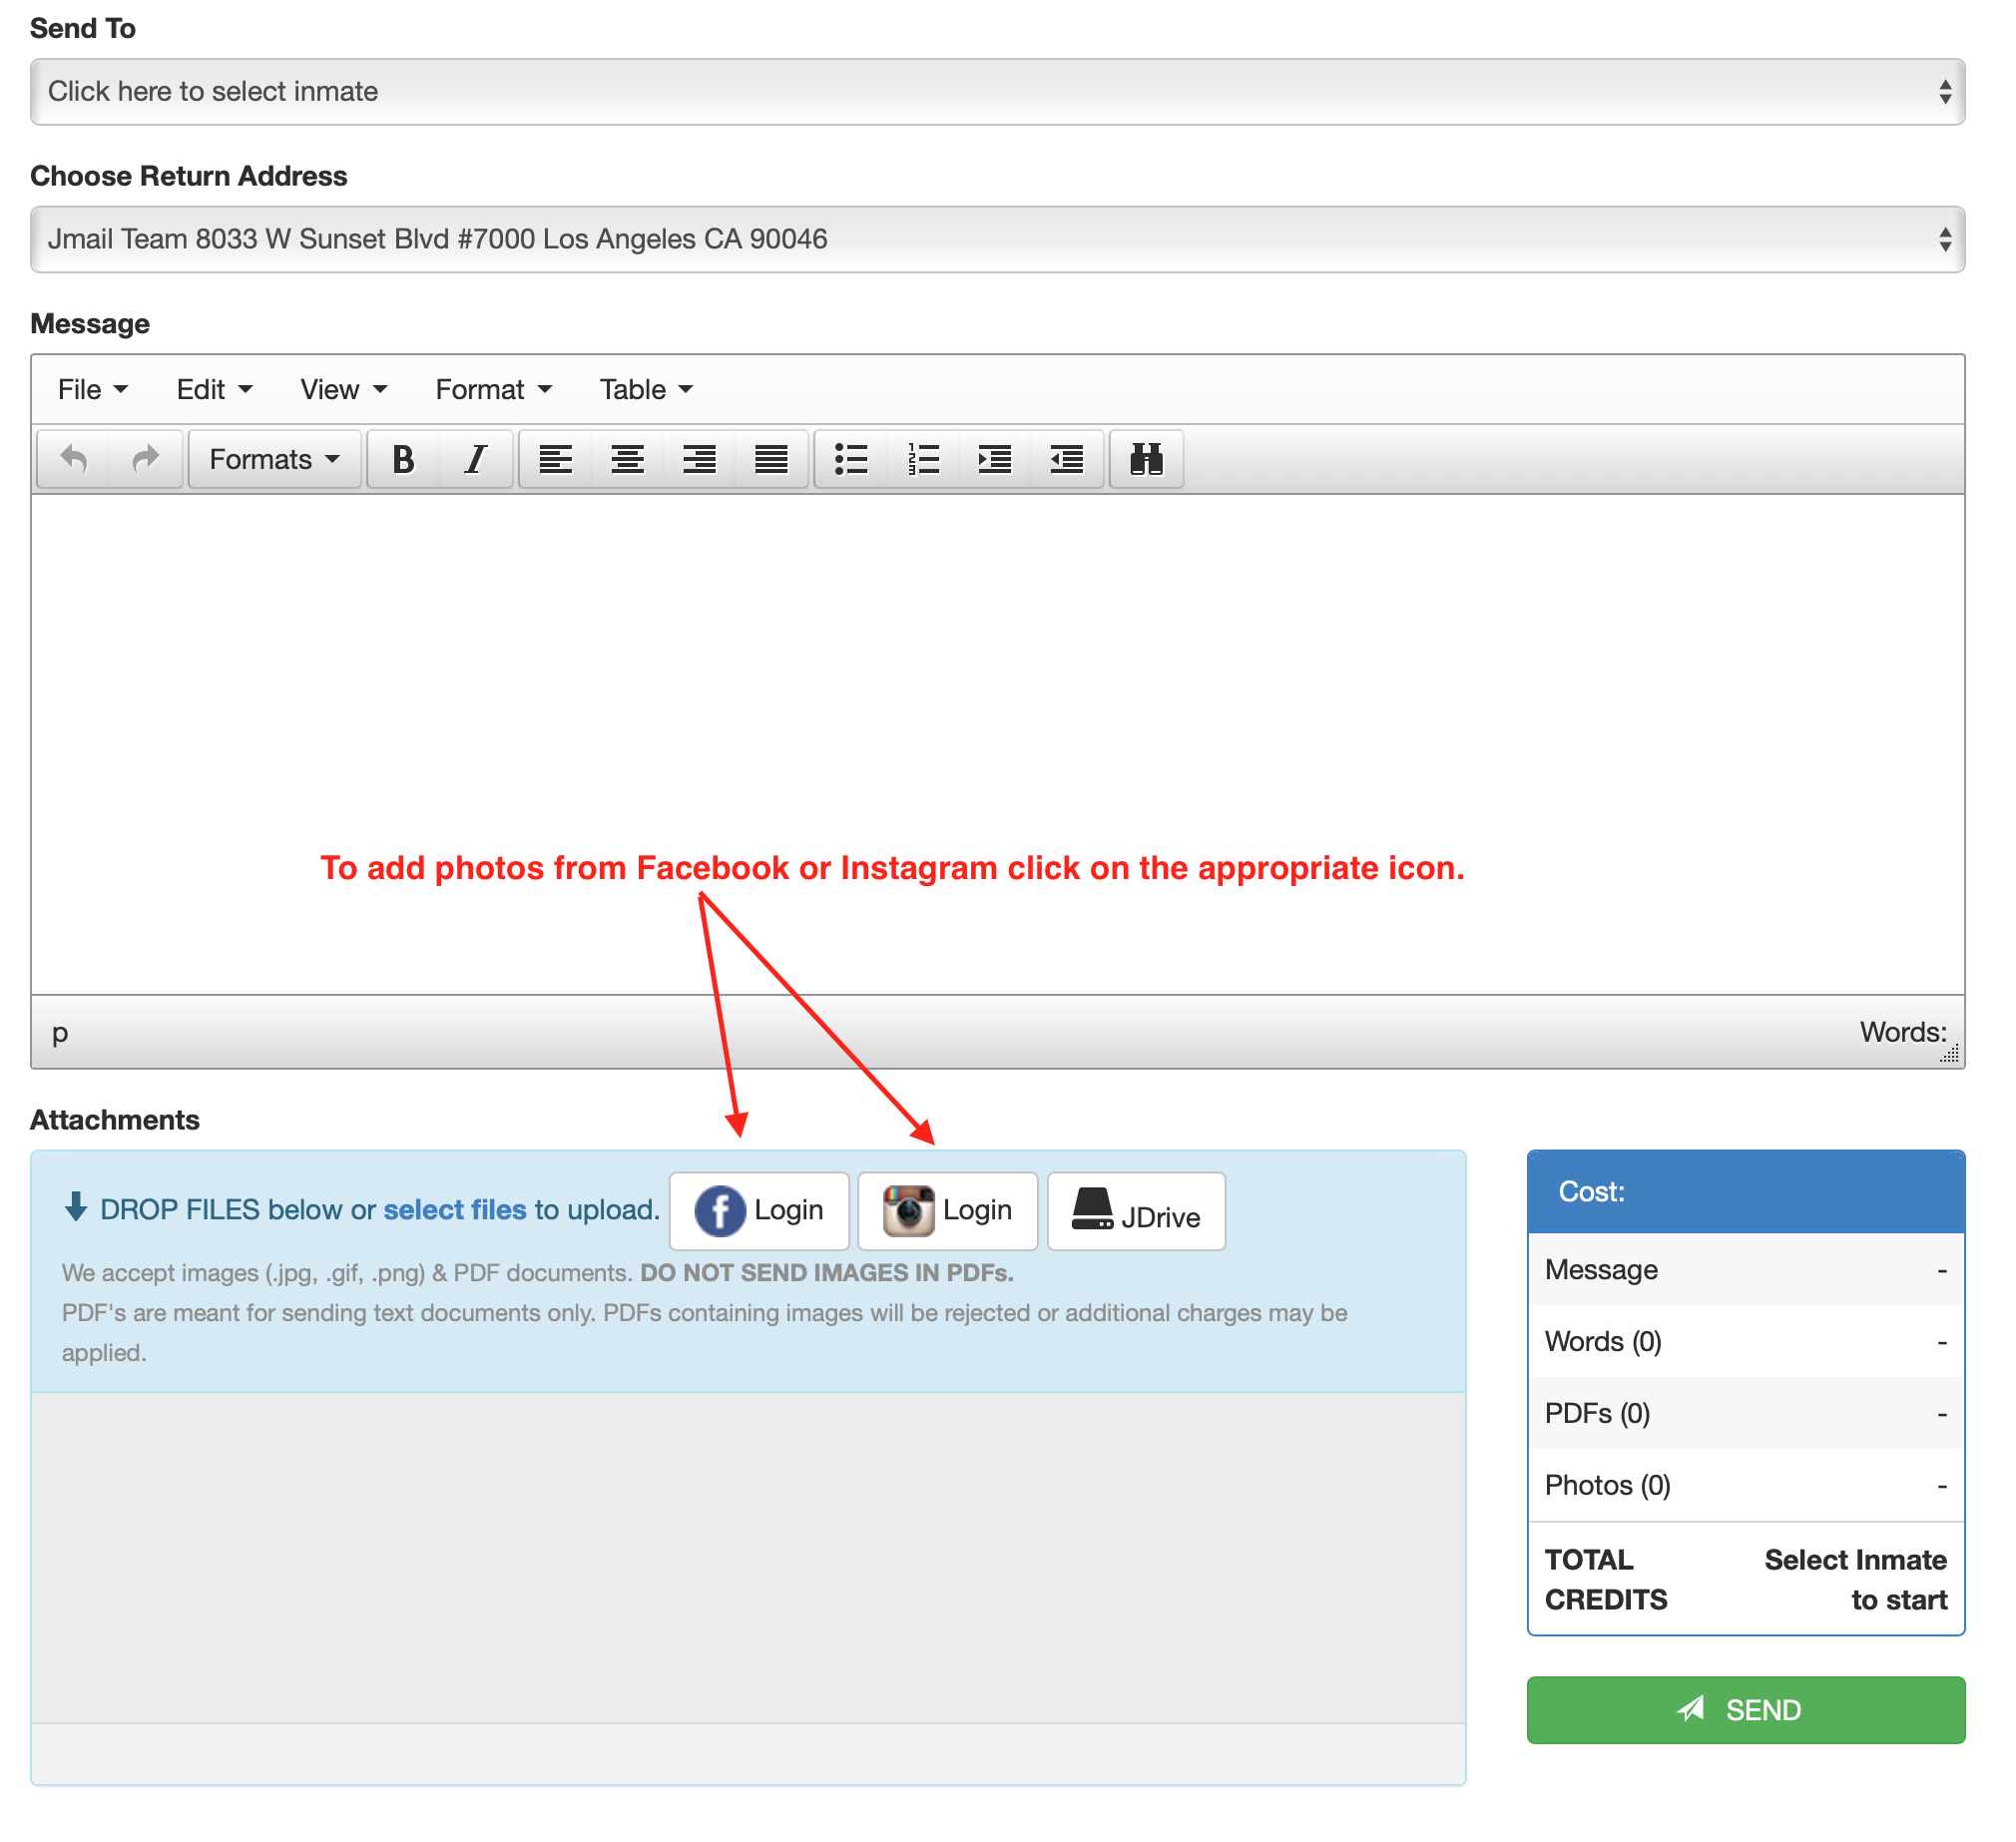
Step 1: Click the icon of the service you want to add photos from, either Facebook or Instagram.
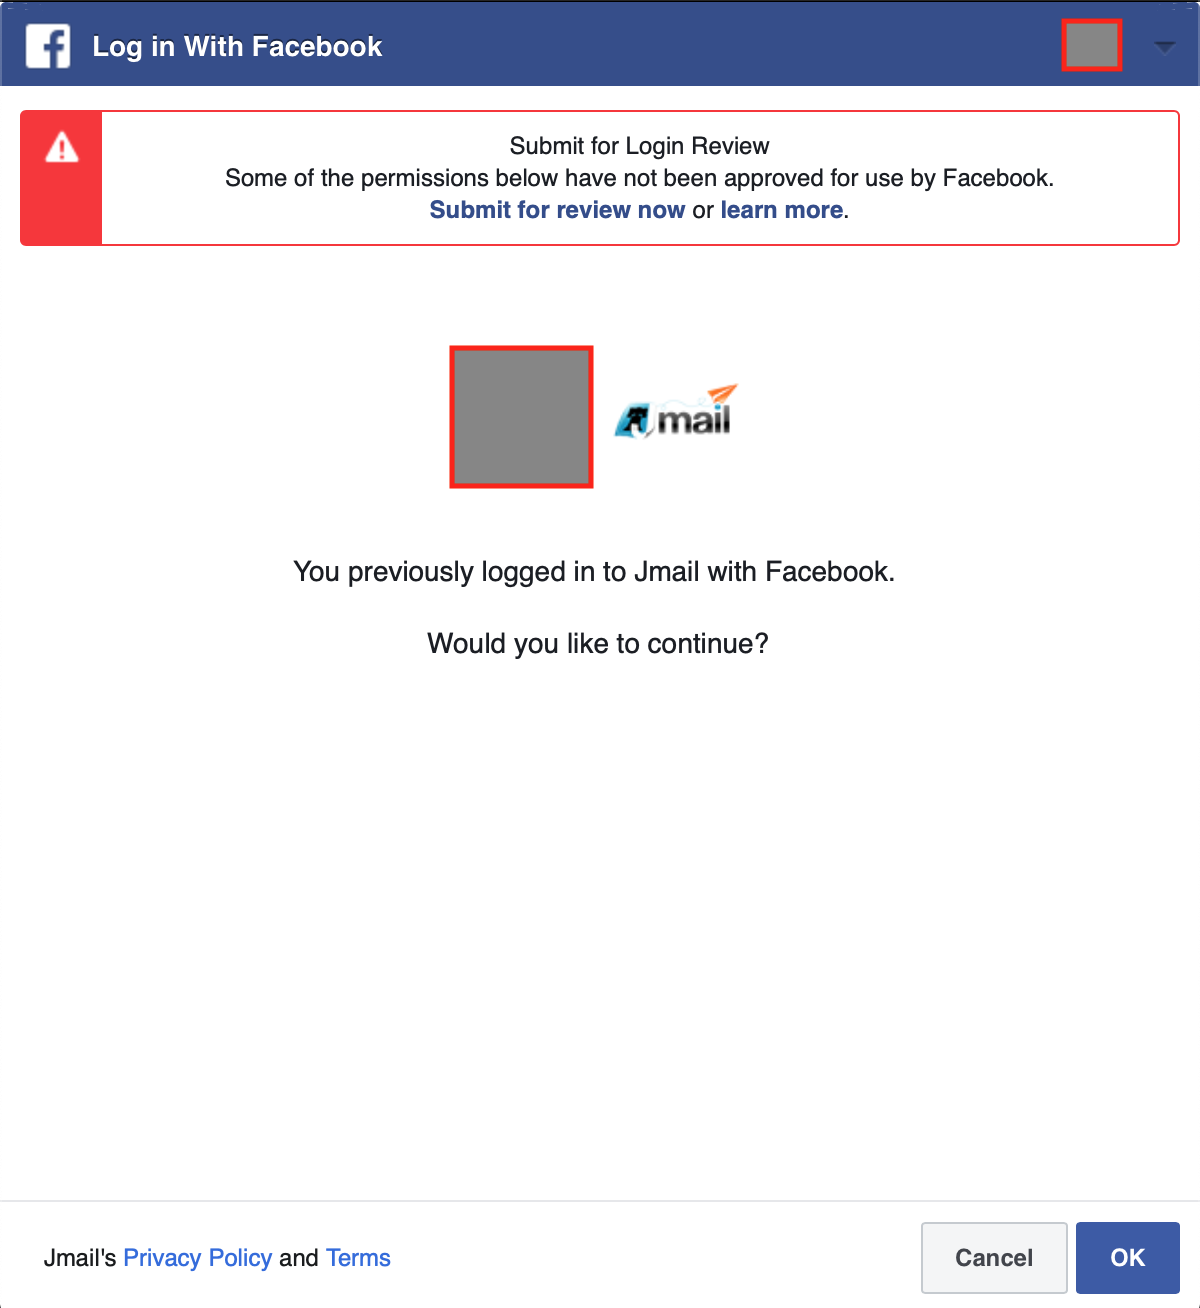
Step 2: Give authorization for Jmail to access your Photos in Facebook/Instagram.
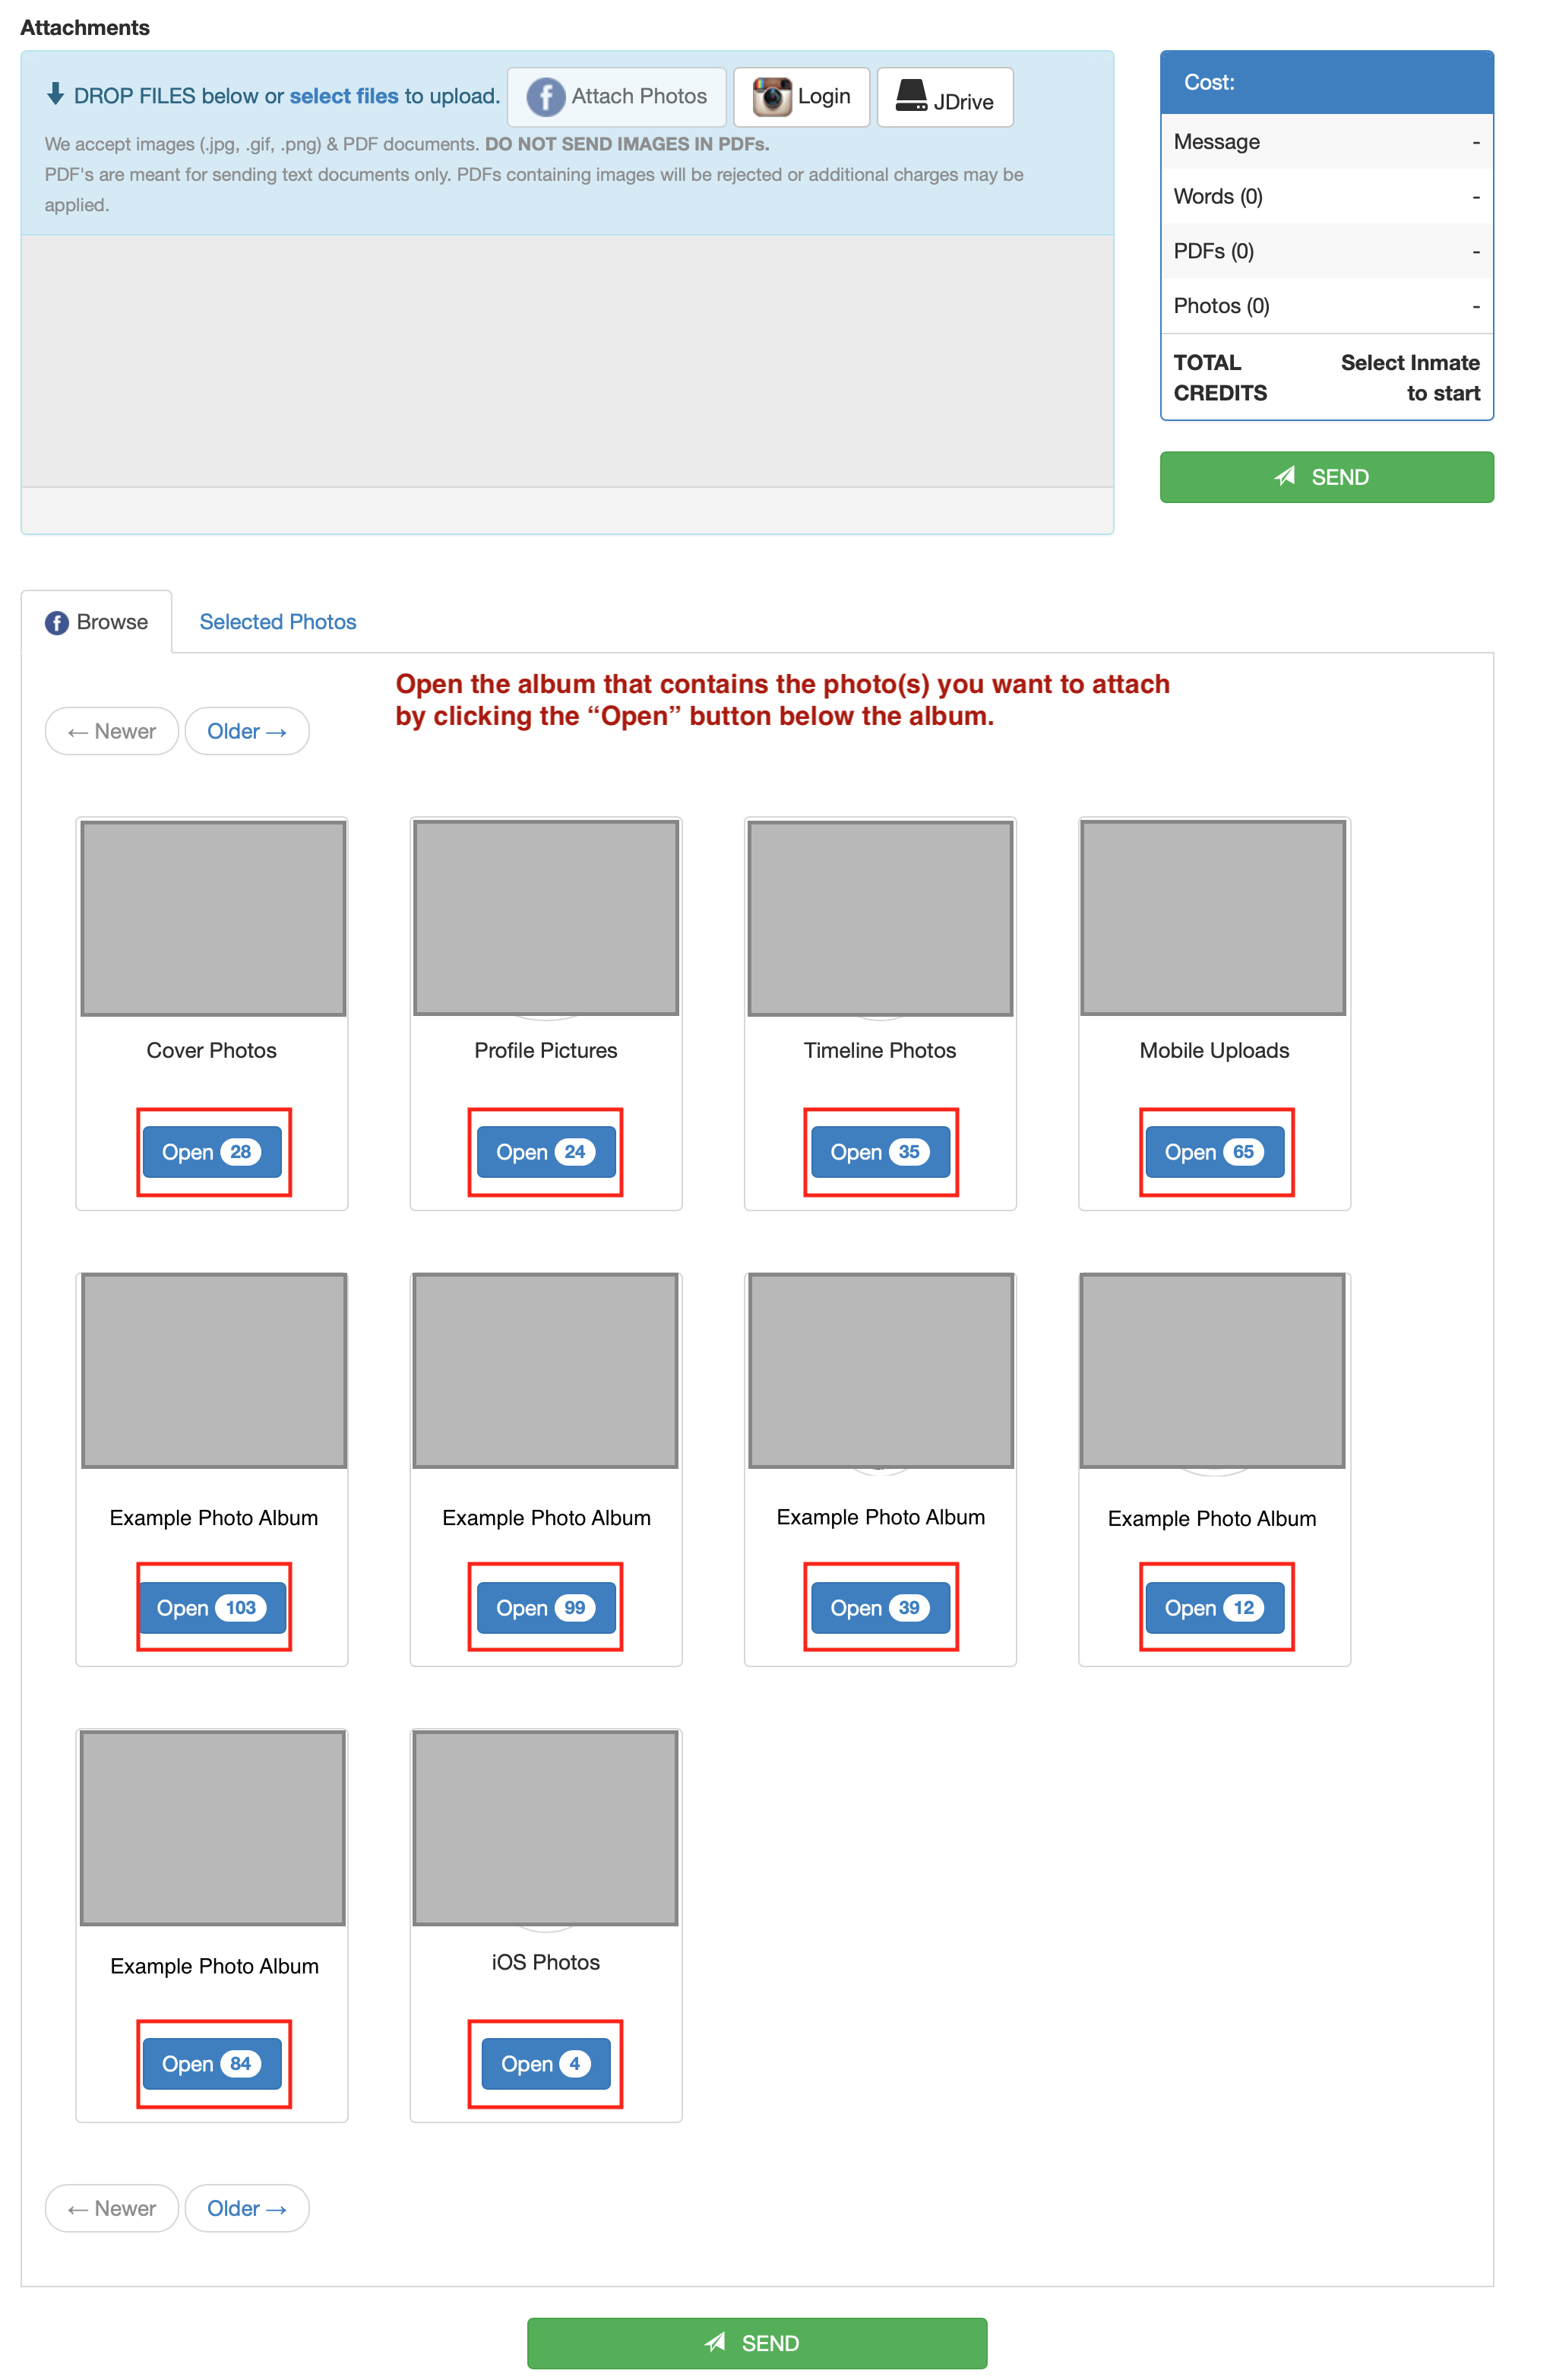
Step 3: Select the Album that contains the photo(s) you want to attach.
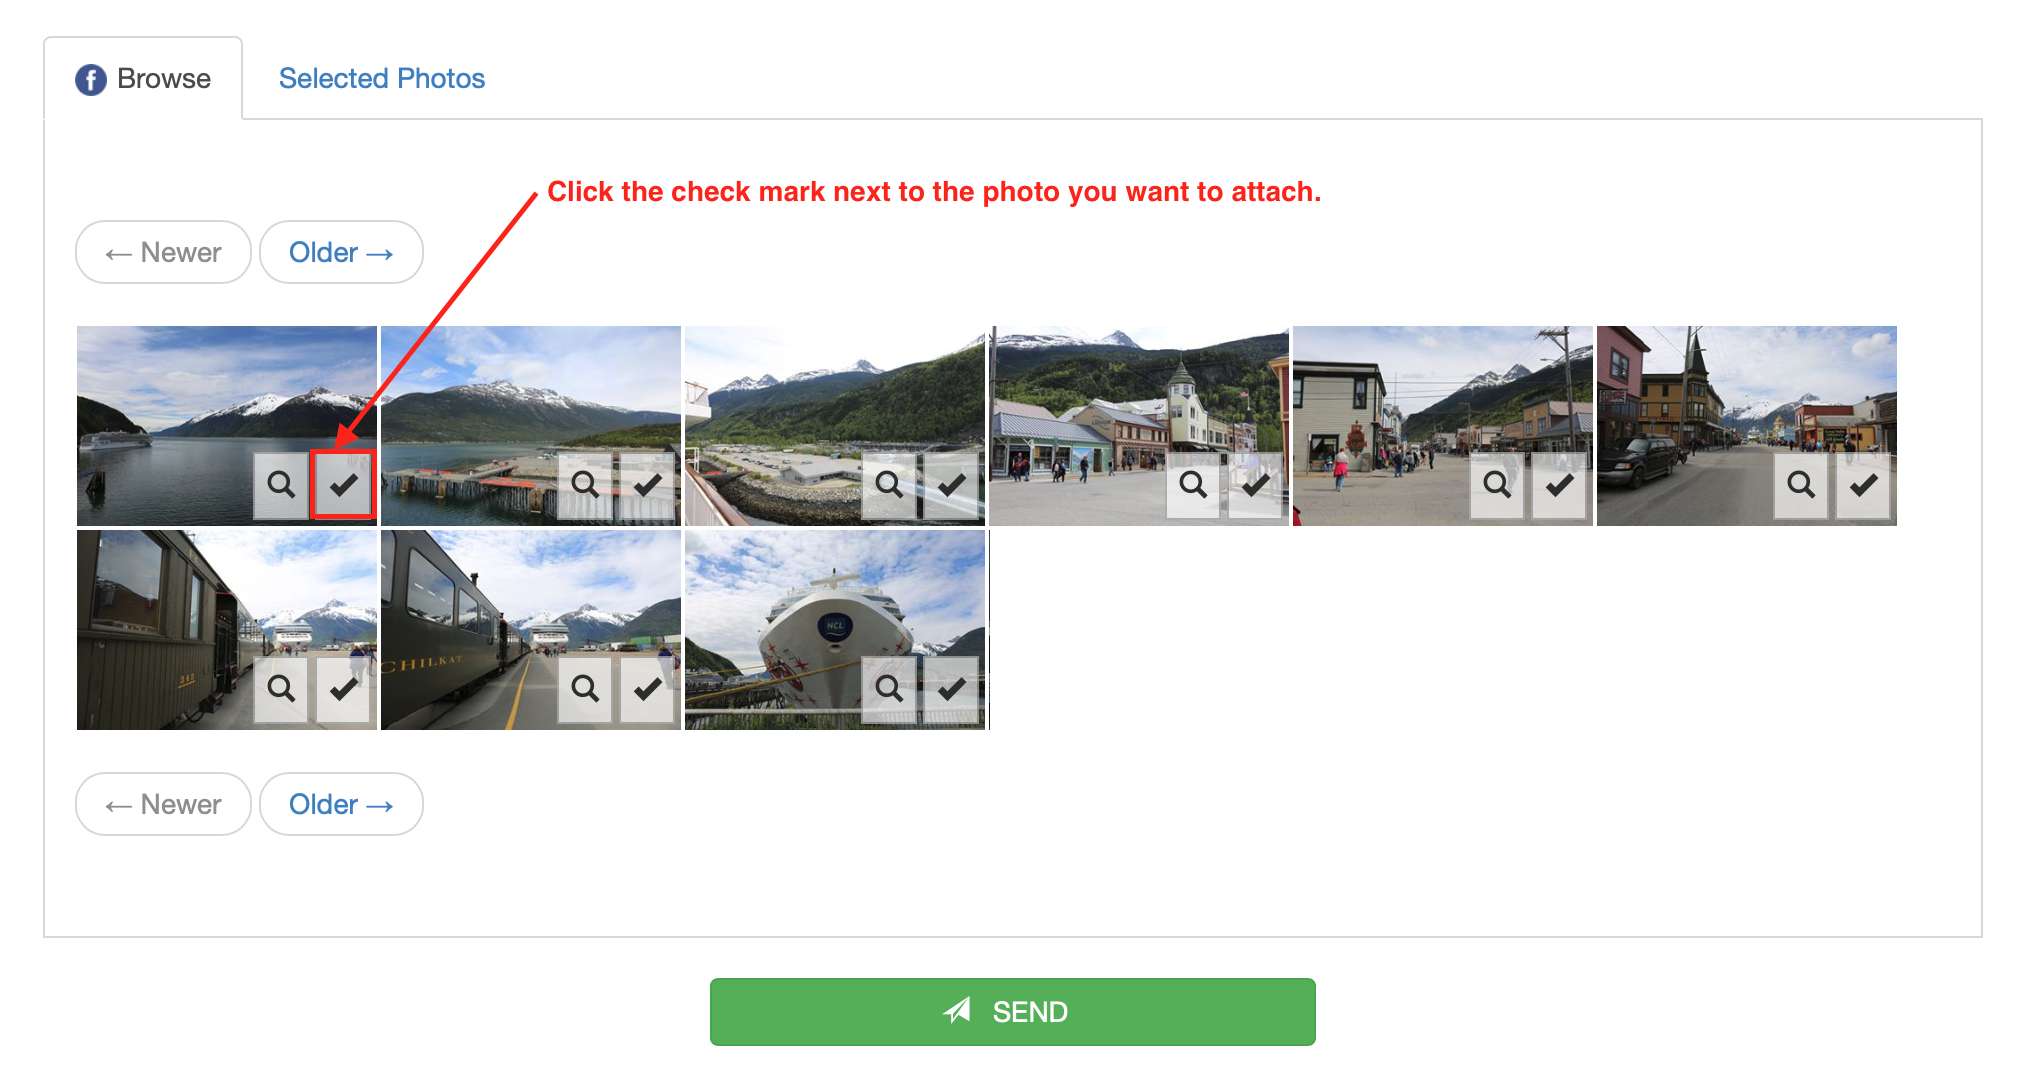
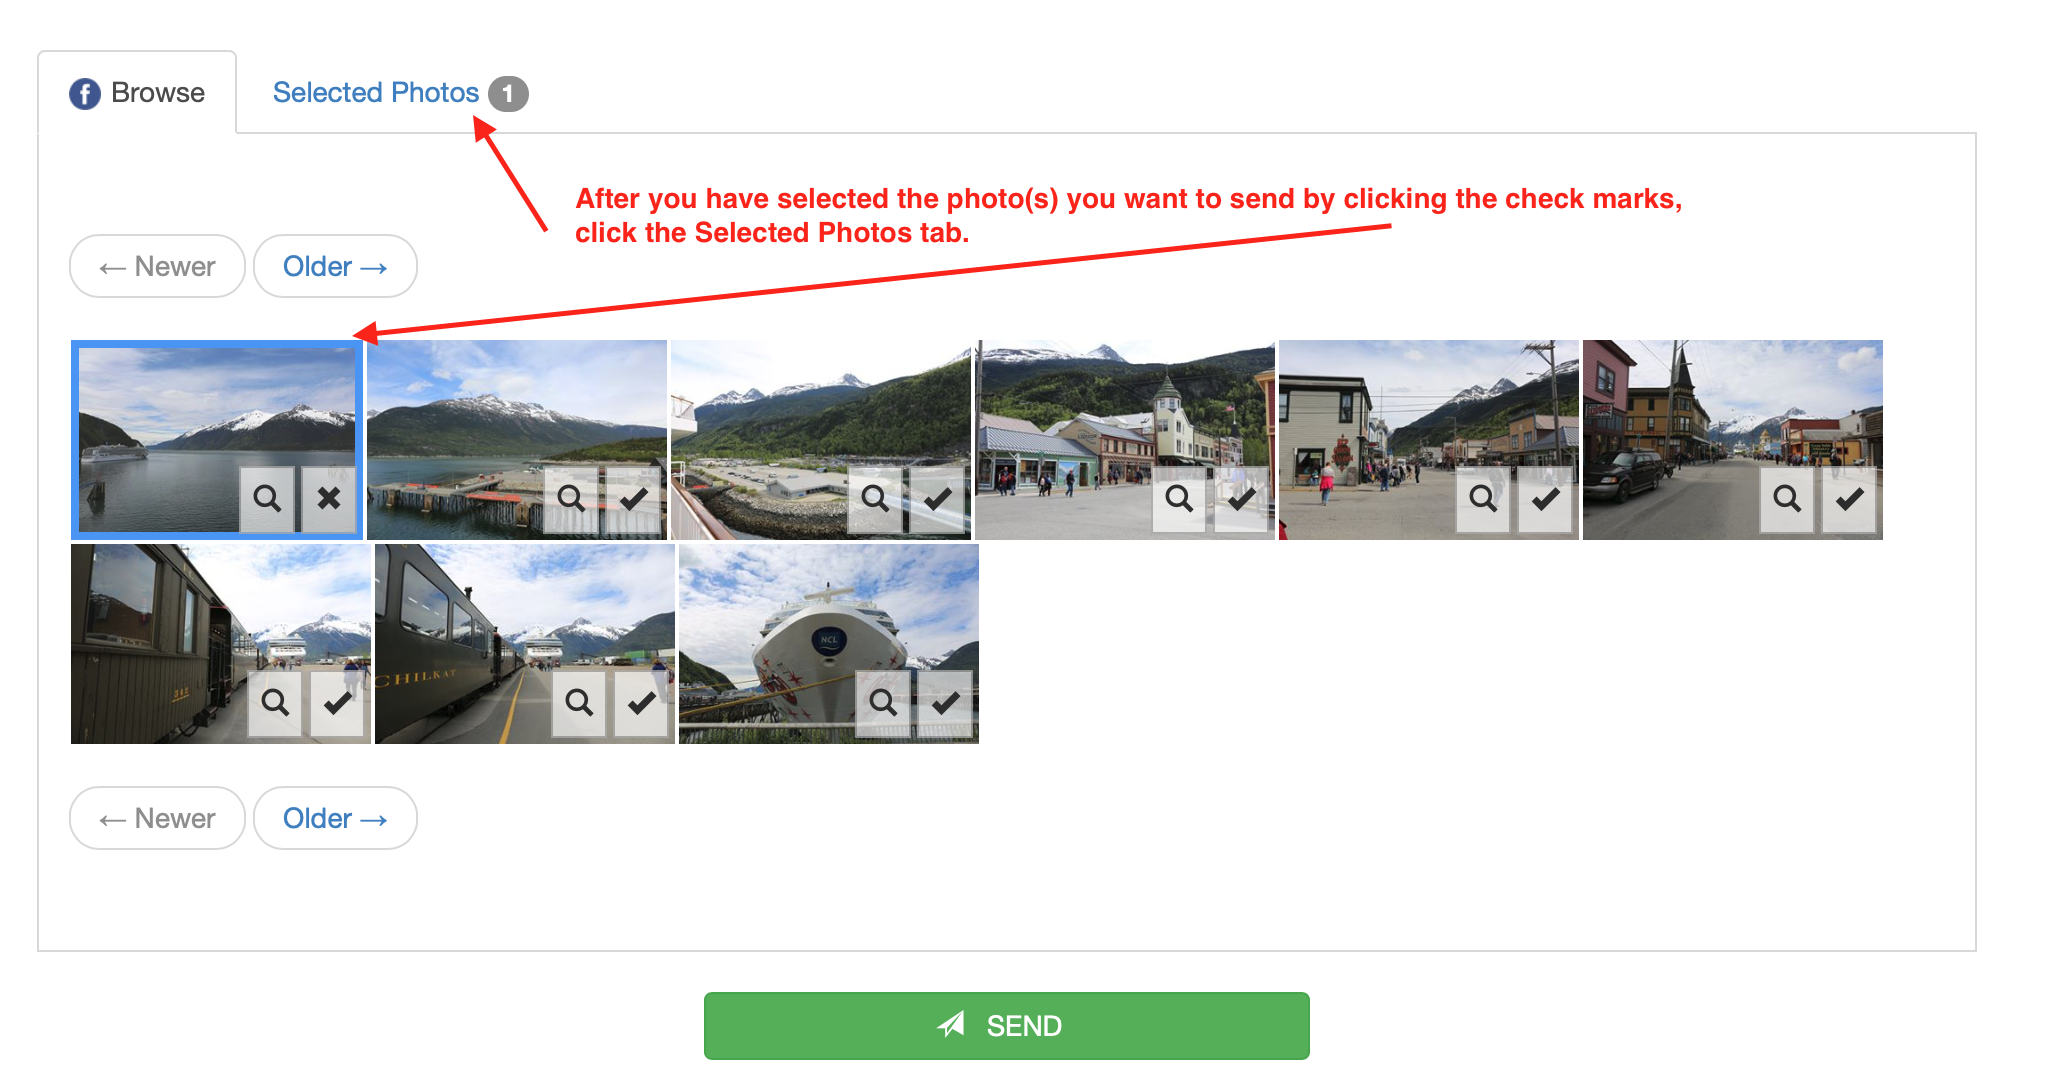
Step 4: Select the photo(s) you would like to attach by clicking the checkmark under the photo(s).
Step 5: After you have selected all the photos you would like to attach, click the "Selected Photos" tab. If you selected the wrong photo by mistake you can click the X on the photo to uncheck it.
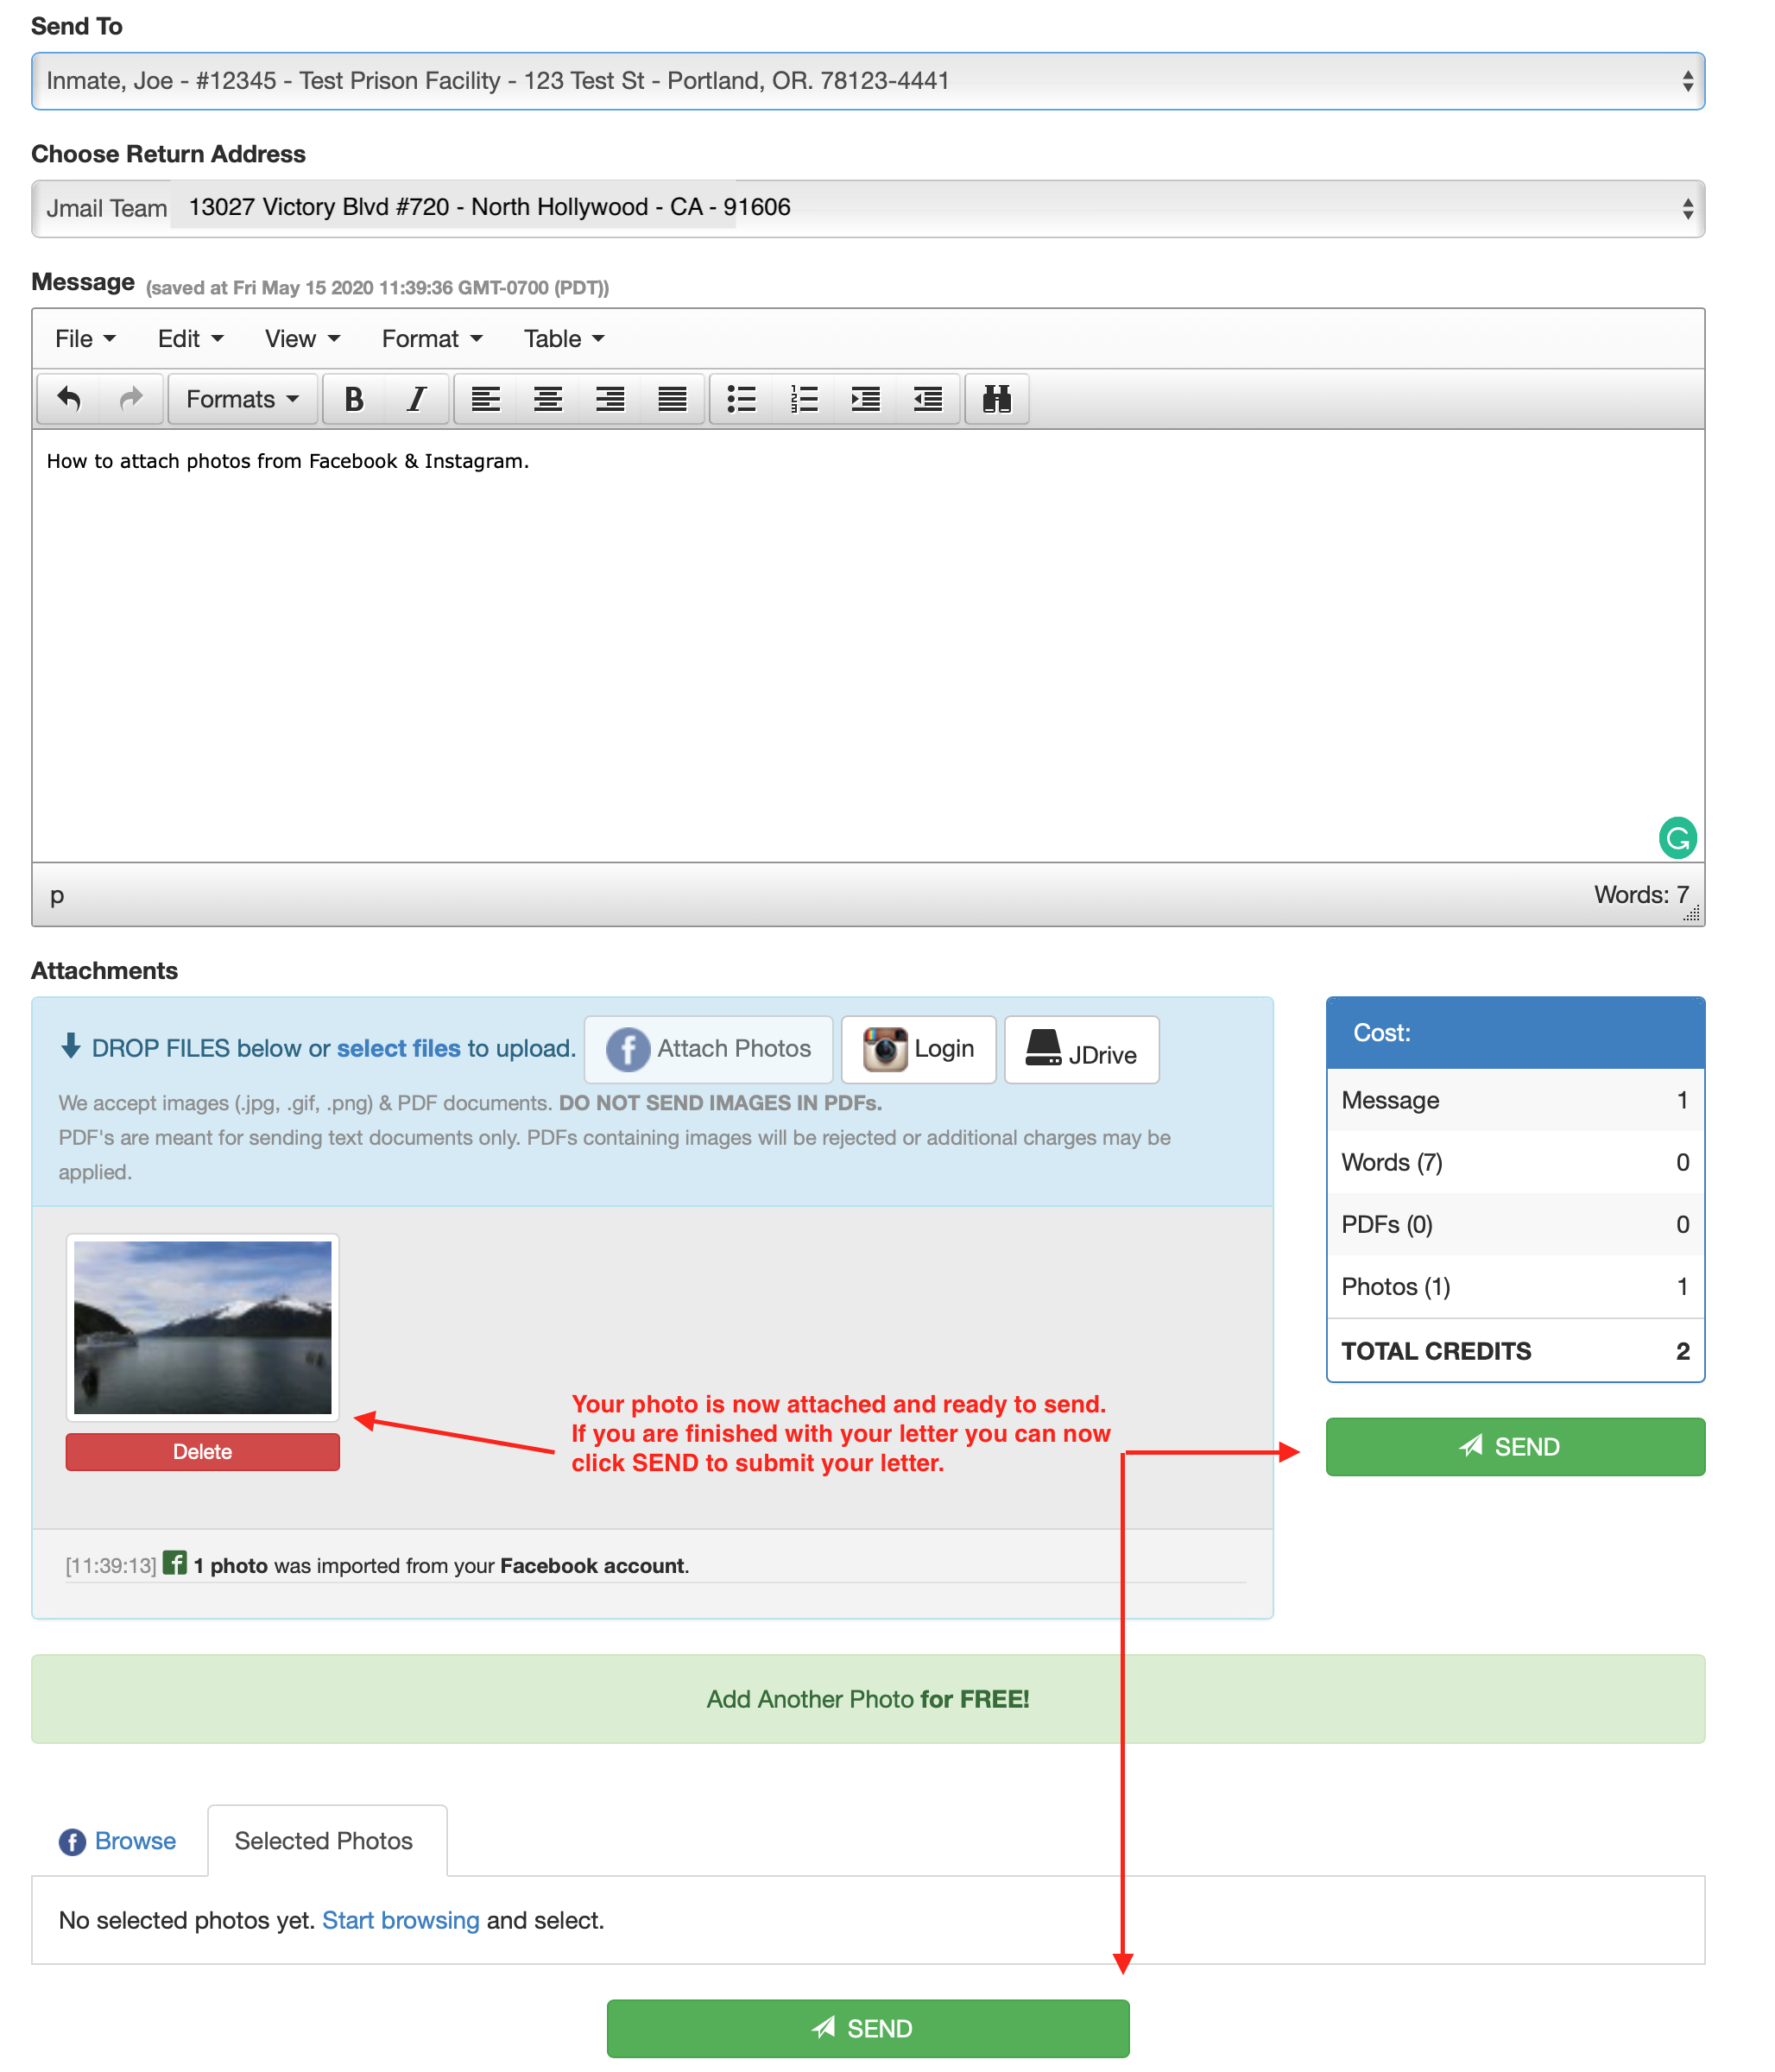
Step 6: Click the Attach Photos button.

Step 7: Your photo is now attached and ready to be sent. Click the "Send" button to submit your letter and you will be taken to the FINAL STEP page to confirm the contents of your letter is correct.
How to send photos from Facebook or Instagram.
If you would like to add a photo to be printed on 4x6 photo paper from your Facebook or Instagram account you can do so by following these steps.
Step 1: Click the icon of the service you want to add photos from, either Facebook or Instagram.
Step 2: Give authorization for Jmail to access your Photos in Facebook/Instagram.
Step 3: Select the Album that contains the photo(s) you want to attach.
Step 4: Select the photo(s) you would like to attach by clicking the checkmark under the photo(s).
Step 5: After you have selected all the photos you would like to attach, click the "Selected Photos" tab. If you selected the wrong photo by mistake you can click the X on the photo to uncheck it.
Step 6: Click the Attach Photos button.
Step 7: Your photo is now attached and ready to be sent. Click the "Send" button to submit your letter and you will be taken to the FINAL STEP page to confirm the contents of your letter is correct.